Comet C/2020 F3 Neowise From the Heart of San Diego
For some reason I like taking photos of astro subjects from the middle of the San Diego. Usually this results in a lot of pain because the objects are so dim and the light pollution from the city tends to wash everything out. To some extent, one can bring out these subjects with post-processing but there is a limit because the data (and information contained in the data) simply isn’t there.
Here are a few shots I’ve taken of the Comet.
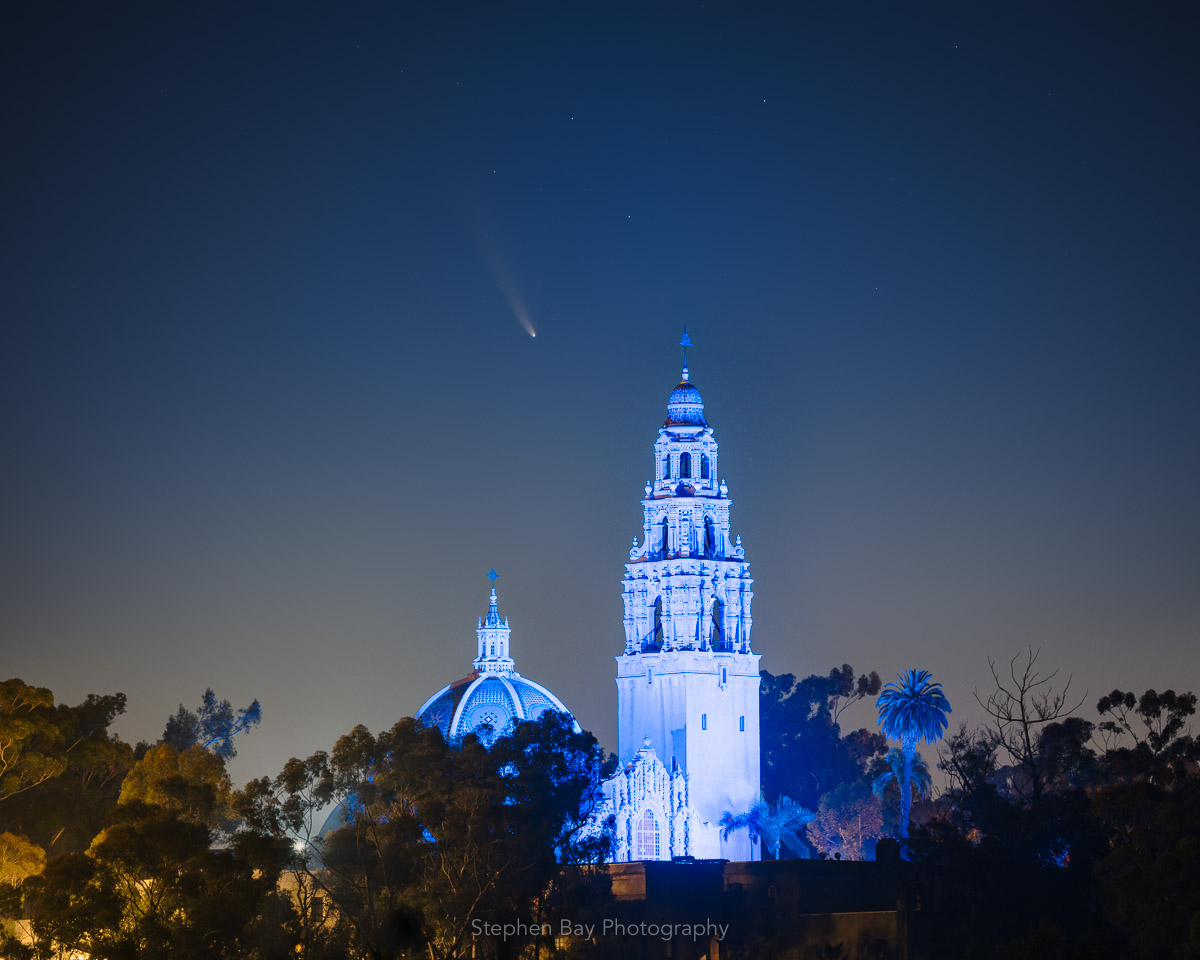 The comet Neowise above the California Tower, Balboa Park, San Diego
This is Neowise from Balboa Park on the morning of July 12th. Although there were no clouds the conditions weren’t ideal as the air was very humid so clarity wasn’t the best. I was only out shooting for about 30 minutes and there was so much moisture, water condensed all over my tripod. There was also a half moon throwing a lot of stray light into the sky..
The image is stacked with 29 sky shots at ISO 1600, 160mm, f/4.5, 1s using Starry Landscape Stacker. Foreground is a separate shot at ISO 100, 160mm, f/7.1, 8s. I had to adjust focus slightly from the comet to the tower – despite the tower being 1/2 mile away, the DOF was still not quite enough to have both in focus at the same time.
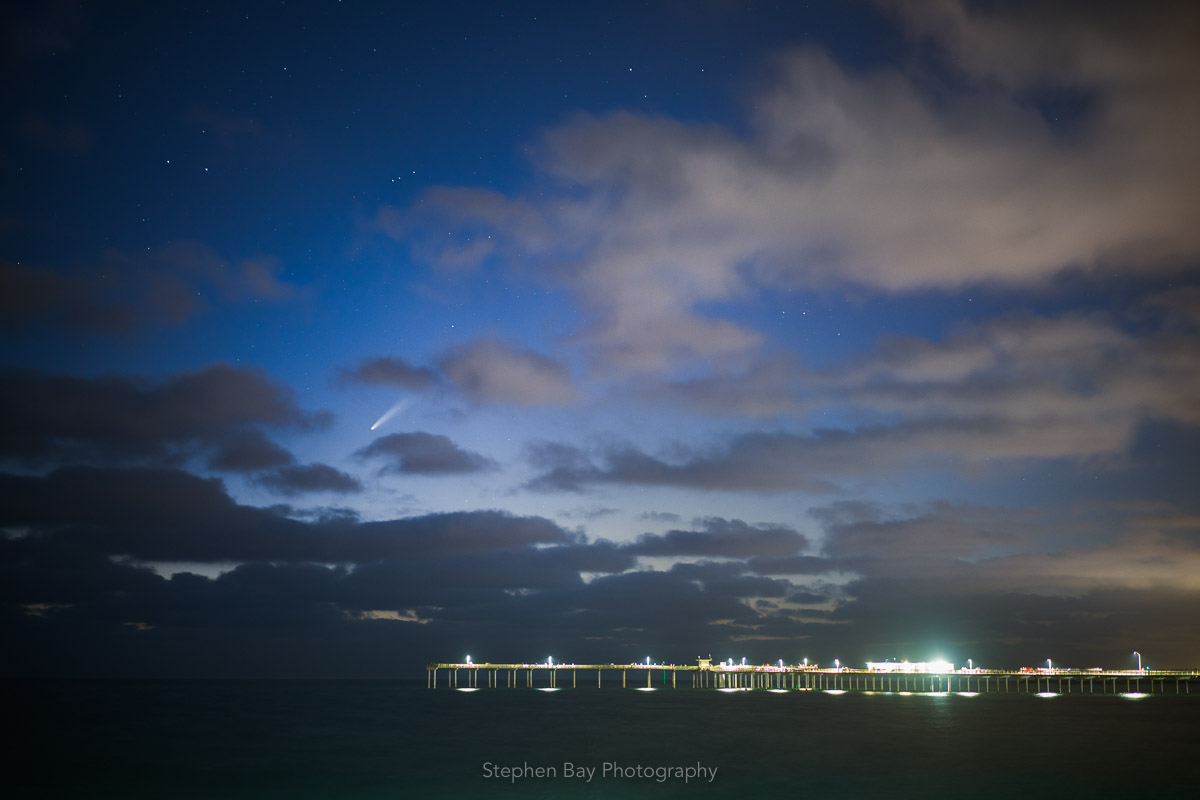 Neowise above the Ocean Beach Pier, San Diego
This shot is from Ocean Beach on the evening of July 15th about 1 hour after sunset. I wasn’t actually sure if the comet would be visible because of the heavy marine layer. Luckily there were some small openings between the clouds.
The image is a single exposure, 55mm, ISO 640, f/1.8, 10s. The biggest issue was getting rid of the extreme color cast on the clouds from light pollution. I ended up triple processing the RAW file in LR and then blended the variants in PS: one regular image, one with the WB colder to neutralize the yellow on the clouds and then a third with the exposure down to recover some of the highlights on the pier (not all, there’s still a bit of burnout).
 Neowise above Scripps Pier, San Diego
This is a single exposure at 70mm, ISO 640, f/4, and 8s. My aperture is slower than I would like due to the limitations of my lens. To reduce noise, I used Topaz Denoise AI (remove noise = 15, sharpen = 15, recover original detail = 0) and then faded it with the opacity slider.
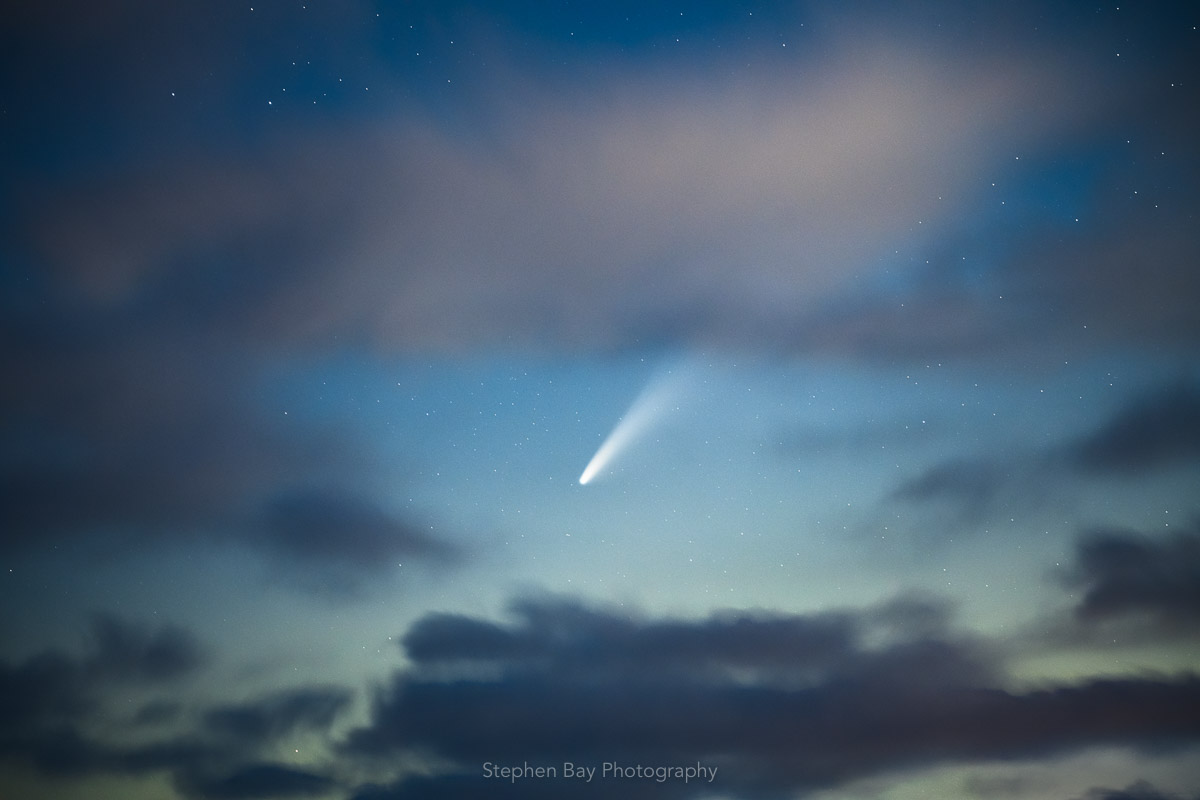 Neowise amongst the clouds. La Jolla near Scripps Pier, San Diego
This is my favorite shot of Neowise. I took this while at Scripps Pier and I noticed the comet was completely surrounded by clouds. I had setup a wide composition for the previous picture that included the pier, but then decided to zoom in to focus on the clouds and comet. This is 14 shots stacked for noise reduction with all base images at ISO 3200, 140mm, f/4.5, and 5s exposure.
Further Afield
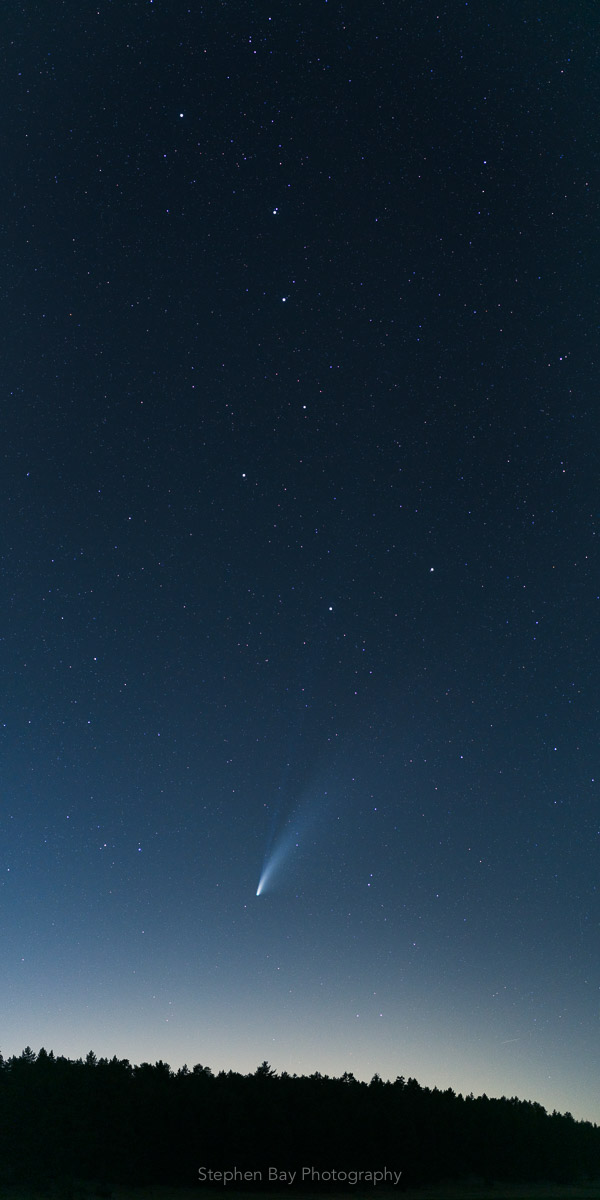
The Big Dipper and Neowise in the Mt Laguna area, San Diego County
This image is from outside the city in the Cleveland National Forest near Mt Laguna (about an hours drive east). This is a vertical panorama with 4 frames all shot at 55mm, f/2, ISO 1600, 7s. I stitched the images in PT Gui with manual control points (I usually prefer making panoramas in Lightroom but in this case the software failed to stitch the component images together).

The Valley of the Moon, Jacumba, California
This last photo was taken on July 26th when the comet was moving away from Earth. This is an exposure blend with the sky at ISO 1600, 55mm, f/1.8, and 7s exposure (13 shots stacked). The foreground is ISO 1600, 55mm, f/2.8, and 121s exposure (3 shots stacked).
Viewing and Photography Tips
In light polluted areas, NEOWISE may be hard to see with the naked eye. If I didn’t know where to look, I probably wouldn’t have noticed it. The comet does come out more distinctly on the camera than you can see. To help spot the comet, you can set your camera in live view and scan the rough area it should appear. Right now (as of July 22), the comet is appearing beneath the Big Dipper so you can use that to find it’s rough location. However as the days pass Neowise will move up and to the left in the sky.
The comet also has two tails: there’s a small, thin, blue ion tail and a larger tail from dust and gases that sublimate (transform directly from a solid to gaseous state) from the body of the comet. I’ve only seen the ion tail in dark sky areas, it was not visible within San Diego city limits. So if you want to photograph the ion tail, you will almost certainly have to travel to a dark sky location.
If you are trying to plan a shot with a foreground subject, I recommend using either stellarium-web.org or PlanIt (this is the best app for precise alignments but there is a bit of a learning curve). In Stellarium, you can obtain the azimuthal and elevation angles and plan your shot manually (bust out your trigonometry).