The Making of a Photo #4 – Seaside Reflections in the Sand
I made this photo at Imperial Beach Pier which is only a few miles north of the border with Mexico. I didn’t do a lot of planning on this day but I felt like photographing at the coast and making a seascape. Usually I check the directions of the clouds and the tide levels before deciding exactly where to shoot sunset – in this case I realized that conditions would be good here and I left early and managed to arrive about 50 minutes before sunset.
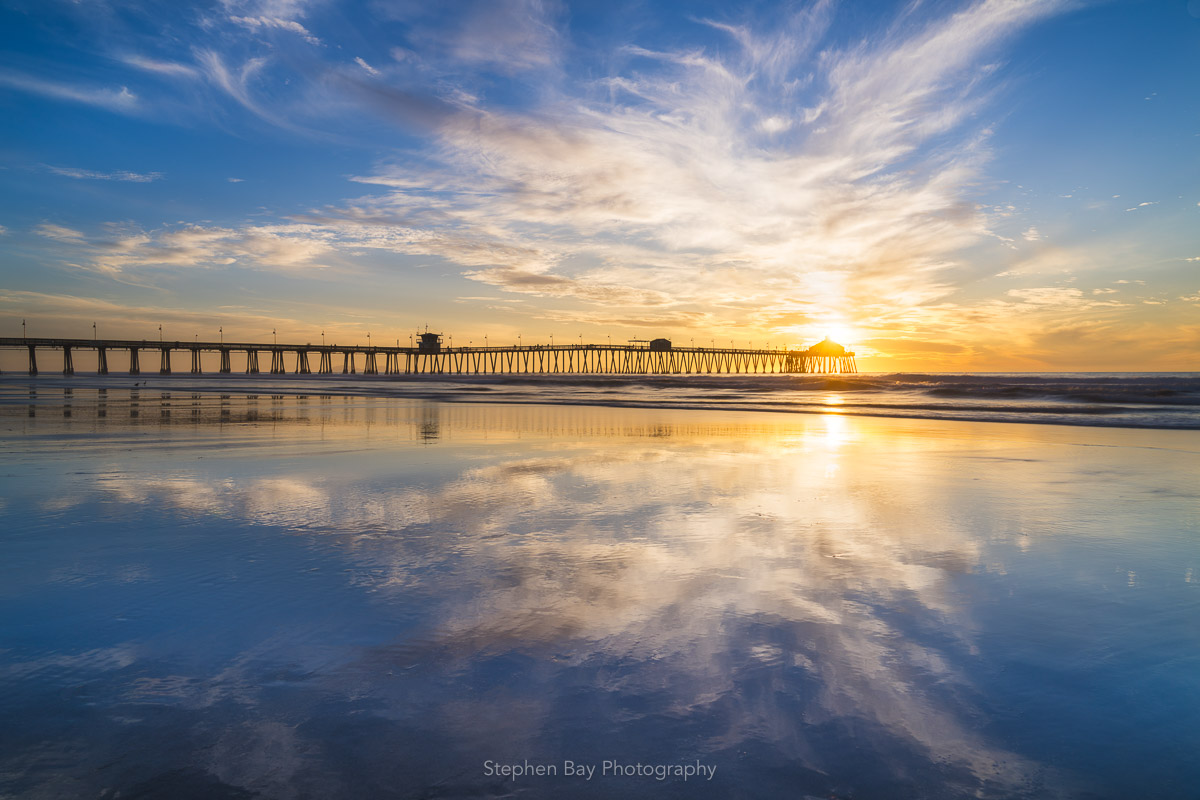 Clouds reflect in the wet sand at Imperial Beach Pier. I chose this composition because I think the cloud reflection looks like a butterfly.
Clouds
I tracked where the clouds would be by a combination of checking webcams and viewing GOES satelliete images from the NOAA website. If you use the animation feature on the NOAA site, you can see how they are moving and get a pretty good idea of where the clouds will be in an hour or two.
Once I got to the pier, I had a choice of where to shoot it. I pick the side which I think is best considering where the clouds are moving and the position of the sun. In this case I picked the north side and I shot toward the south-west. This is also a good angle because I could position the sun over the end of the pier.
Reflections
To get a good reflection you need a thin layer of water on top of the sand. The sand cannot be damp, it must be wet. The water also can’t be in motion as that will disturb the surface and result in a blurry reflection.
The best time is usually at low tide when the water level is low exposing a large area of the beach. When a bigger than normal wave comes in, it travels up the beach and leaves a layer of water over the sand. Wait for it to dissipate a bit and then shoot before it fully drains away. Because the wave was larger than normal, you will have a few minutes to photograph before another large one comes in.
Here are some more tips:
- search for a flat part of the beach, you don’t want the sand to be at too steep of an angle
- you may have to move around a bit to find a section where the water tends to sit and doesn’t drain too rapidly
- play around with the height of your camera to find the best angle for the reflection
Low tide usually lasts for an hour or two and that leaves plenty of time to shoot.
Shooting
This is a shot directly into the sun. So if the exposure is right for the sky, the foreground is very dark and if the exposure is right for the foreground, the sky is blown out. In cases like this I always bracket: I start with a good exposure for the foreground and then I drop the shutter speed in 1 stop increments until there is no blow-out in the sky.
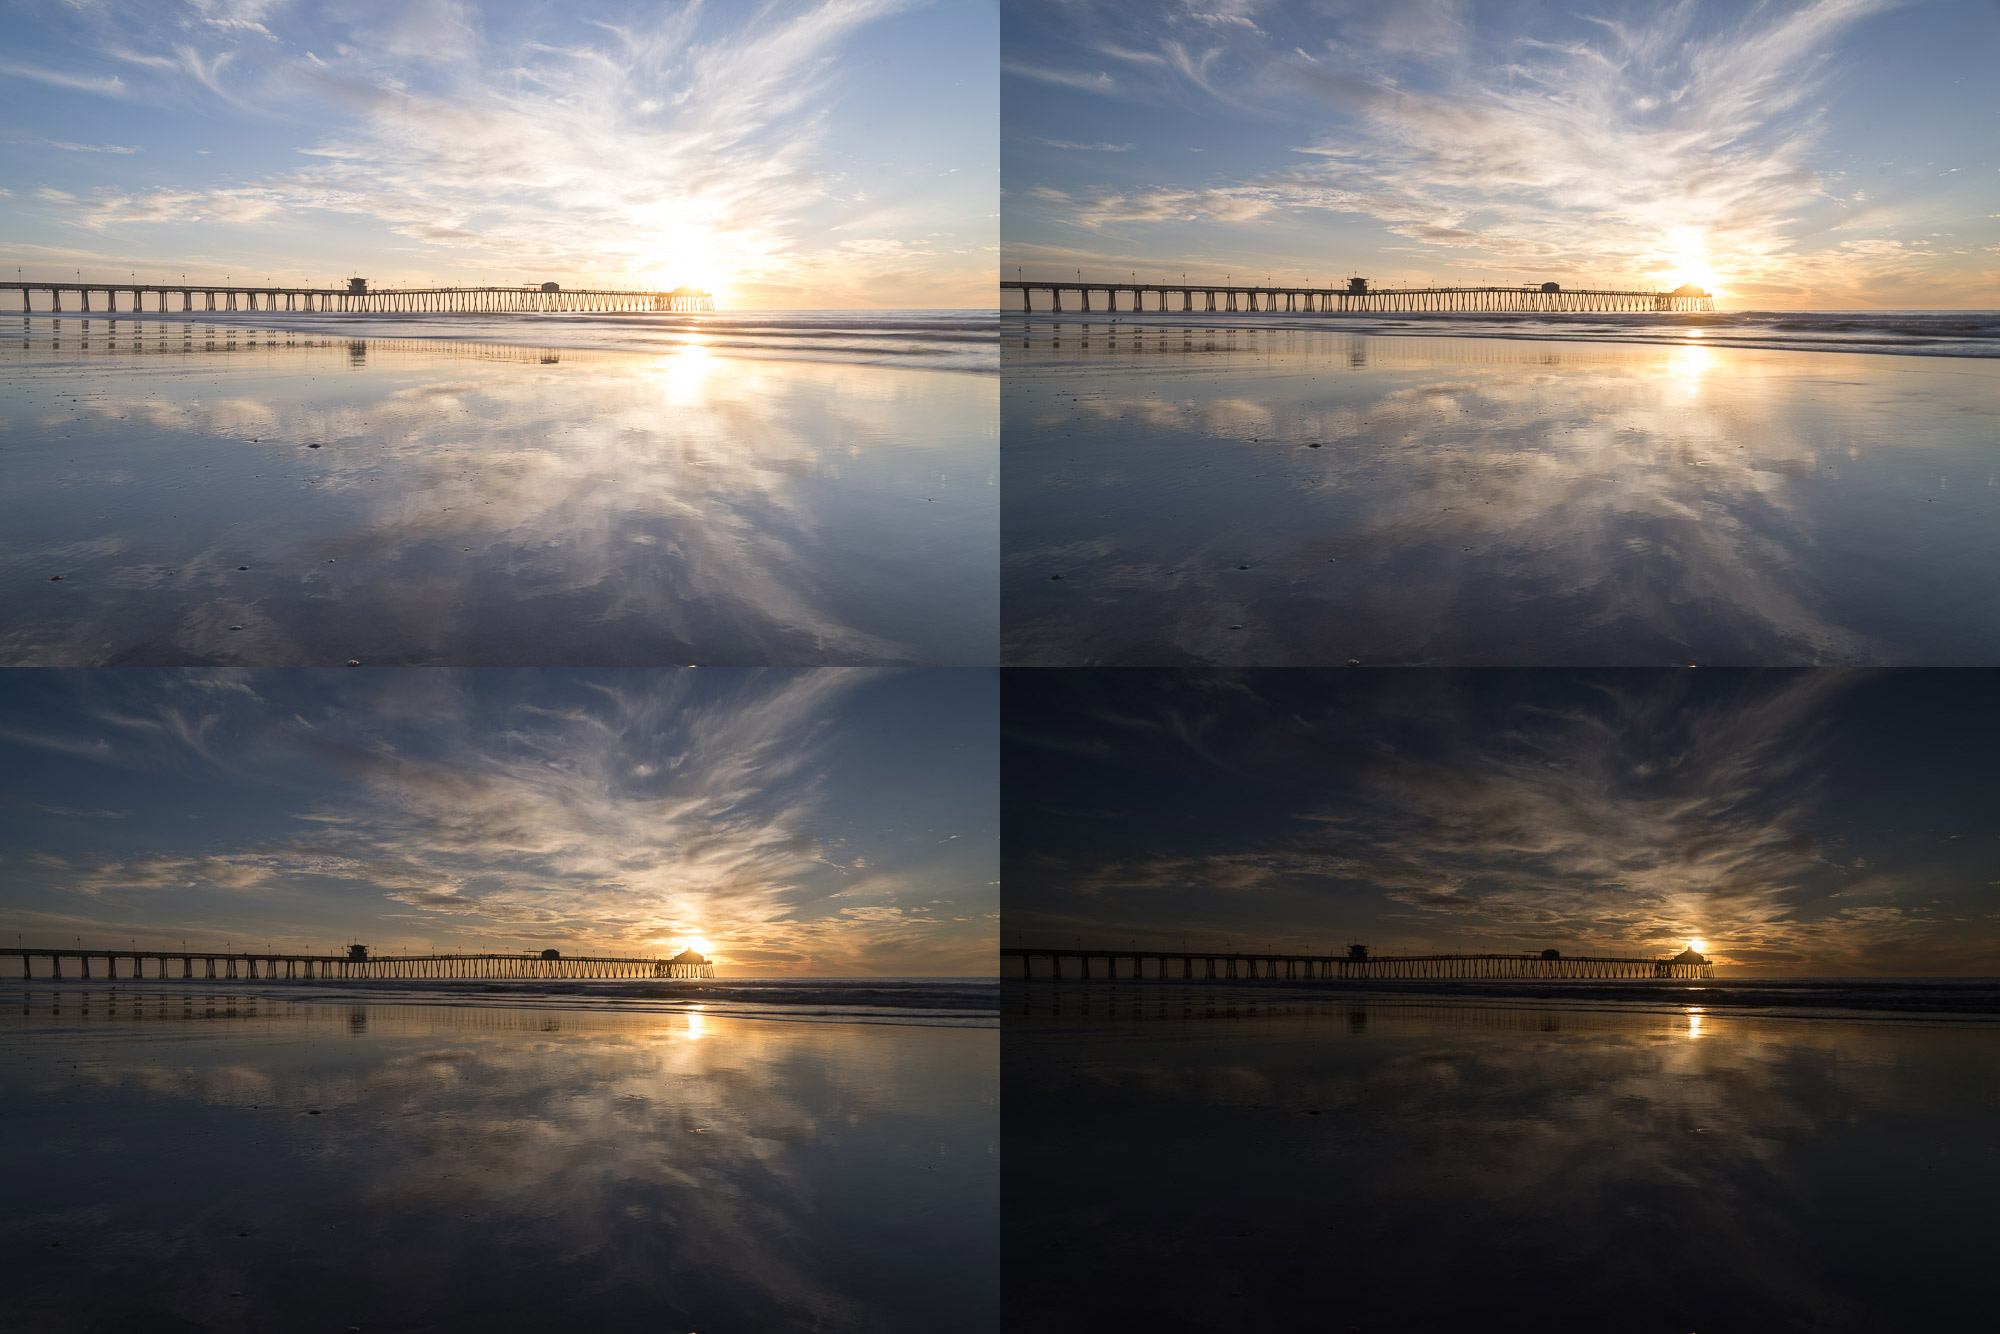 Bracketed images at ISO 100, 24mm, f/11, and 1.3s, 0.8s, 1/3s, and 1/10s.
An alternative to bracketing is to use graduated neutral density filters. Although I don’t use those personally, this is a good situation as the horizon is flat and the pier is backlit and mostly in silhouette with little shadow detail. You may need to brighten areas where the grad ND filter darkened the sky too much.
Editing
I usually start by picking a shot that is somewhere in the middle of my sequence. In this case it was the second brightest shot which is mostly fine except for a bit of blowout around the sun. I edited this in Lightroom to recover a bit of the shadows and highlights (as much as I could). I then fix the remaining blownout parts by bringing the image and the darker brackets into Photoshop as separate layers and then blending them. There are several ways to do the blending but in this case I used a combination of blend-if and layer masks.